Magnetically Mounted Rear View Mirror
I’ve been riding with a rear view mirror for forty years. For the first fifteen or so years I had one that clamped to my glasses. Then I got tired of damaging my glasses and figured out a way to build the mirror onto my helmet. That worked well for many years, but it had some downsides. The major one was that the mirror was pretty delicate, and any manhandling of the helmet risked knocking it out of adjustment. It was also pretty ugly:
Fancy Mirror
After years of idle contemplation I finally got serious and came up with a nice design for a magnetically mounted mirror. Rare-earch magnets, ABS plastic, stainless steel wire, epoxy, 3M mounting tape, and a couple hours of sawing, drilling, and fabricating produced a very clean design:
I’ve built two of these and I’m very happy with how they work. The only downside is that they’re difficult to build. When I bought the recumbent I needed another mirror, so I came up with a cheaper and easier way to build one.
Building A Mirror
After some Amazon sleuthing and a bit of experimentation I came up with a fairly simple and cheap bill of materials that would let me build a mirror in about half an hour (the version below took just under an hour including fussing around with photos). Bend the mount wires a bit, throw away one section of the armature, cut down the mirror, and Bob’s your uncle.
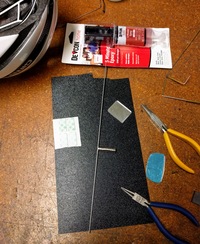
Raw Materials
Tools
- Needle nose pliers
- Scribe
- Half-round file
- Vise Grips
Optional
I find the stock mirror a bit too large so I like to cut it down by about 1/3. This accounts for about half the fabrication time and requires several extra tools. You can skip this part if you want. For this part you’ll also need:
- Hacksaw
- Masking tape
- Vise
- Sandpaper
- Sharpie
Step by Step
Lay out the parts:

Take apart the Bike Peddler mirror and discard the small L-shaped intermediate piece.

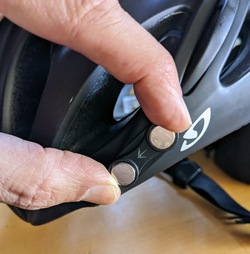
Label the poles on your magnets. Mark an arrow on the inside of one magnet bar so you can keep track of how you’ll mount it; this will be the “helmet” bar, the other one will be attached to the mirror.
![]()
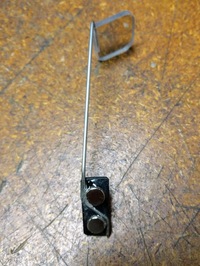
File a small divot into the middle of the “mirror” magnet bar. With the south pole up it should be on the left side. This will help the armature tab grip the bar.

Out of the box the armature doesn’t get a good grip on the magnet bar.

Bend the armature mounting tabs in a bit…

So that they grab the magnet bar.


Here you can see the tab about to slide over the filed area.

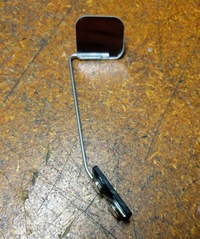
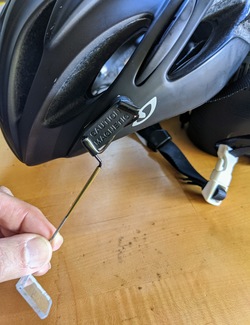
Once you’ve got the armature clamped on the magnet you’ll want to bend the boom out a bit.

Now take a close look at the arm on the end of the boom. You can see that there’s a subtle dip or bend in the wire.

Use a pair of Vise-Grip pliers to clamp down on this and straighten it a bit. This will let the arm fit into the mirror without risk of cracking the plastic.

Now use the pliers to angle the end of the arm back towards the boom slightly.


OK, now we get to the optional steps to cut down the mirror. You can skip this part if you want a larger mirror.
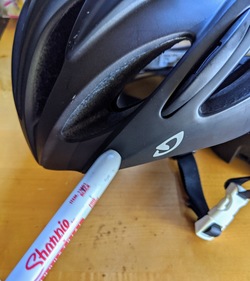
Here’s the out of the box size.

Wrap the mirror in masking tape (both sides), find the hole and mark it.

Now draw a line across the mirror about 2/3 down the length. Make sure the hole is on the long side of the line.

Clamp it in a vise on the short side (the part you’ll be discarding).

Cut it.

Sand down the cut and chamfer the corners.


Then sand it smooth by hand.


Peel off the tape and now you’ve got a smaller mirror with no scratches.

Carefully push the mirror onto the arm using a twisting motion

Next you’ll need to put the adhesive tape onto the helmet magnet.

Mark the tape using the magnet bar as a guide. You’ll want the tape to be a bit narrower than the bar. Cut it to size using an X-Acto knife.

Clean the bar with rubbing alcohol, peel off the backing and affix the tape to the magnet. Don’t peel off the other side of the tape until you’re ready to mount it on the helmet.

For bonus points you can use a sharpie to blacken the part of the armature that’s connected to the magnet.

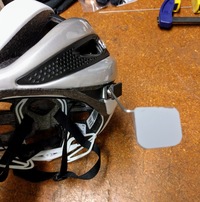
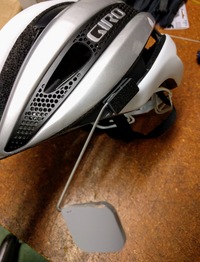
And there you go. Ready for mounting.

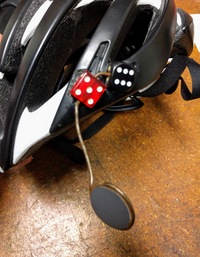
Mounting
Here’s how you mount a magnetic mirror on your helmet.
It should go on the left side, down low and near the front.
You’ll need to do some experimentation to figure out the exact spot. Put the helmet on. Sit in a chair. Turn around and identify some object behind and a bit to the left. Lean forward as if you’re on the bike. Hold the mirror on the selected spot with your finger. Look and make sure that the object is roughly in the center of the mirror. You’ll be able to bend the boom and the arm to do final adjustment, but it’s best to get it close before you get the adhesive involved.
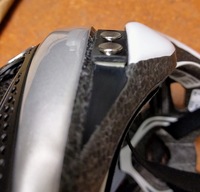
Separate the helmet magnet from the mirror magnet. If there isn’t a flat-ish spot on the helmet you can gently flatten the foam to make the mounting more secure. Clean the spot with some rubbing alcohol. Peel off the backing from the magnet and stick it to the helmet. Make sure that the arrow points forward.
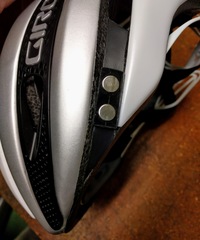
Press firmly and evenly for ten seconds or so. Now you can mount the mirror back on the magnet. It should look something like this:
If you’re lucky your helmet will have a natural place to put the magnet.
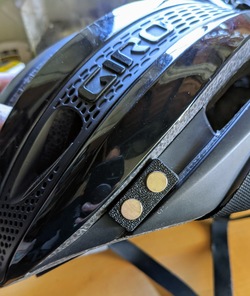
I recommend against doing terrible things to your helmet…

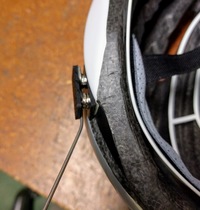
To remove the mirror from the helmet hold it by the boom and angle it up or down so that the front magnets slide off of each other. Then you can pull to the side to break loose the rear magnets. Pulling both sets of magnets apart at once puts too much strain on the adhesive.
If you’re really lucky you might be able to turn the mirror arm around backwards and slip the mirror into a vent on the helmet while the magnets pull together from the back of the mount.